-
British women tackle challenges of renovations in France with podcast
Series explores bureaucracy, construction rules, planning permissions, diagnostics and everyday hurdles
-
How to deal with asbestos in France
As the material ages, it degrades - becoming more likely to release harmful fibres
-
How I reinforced my barn's 150-year-old timber beams
Columnist Nick Inman shares his experiences restoring an old French farmhouse
DIY in France: Fixing garden wall is opportunity to study old methods
Writer Nick Inman’s main challenge in rebuilding his orchard perimeter was replicating the old mortar

I am lucky enough to have a walled orchard, which dates from the 19th century.
The walls, naturally, are exposed to the elements and some of them have survived in a better state than others.
For a long time, I watched the east wall deteriorating, knowing that I had to do something about it but handicapped by other priorities. Finally, I got around to repairing it.
Trial and error
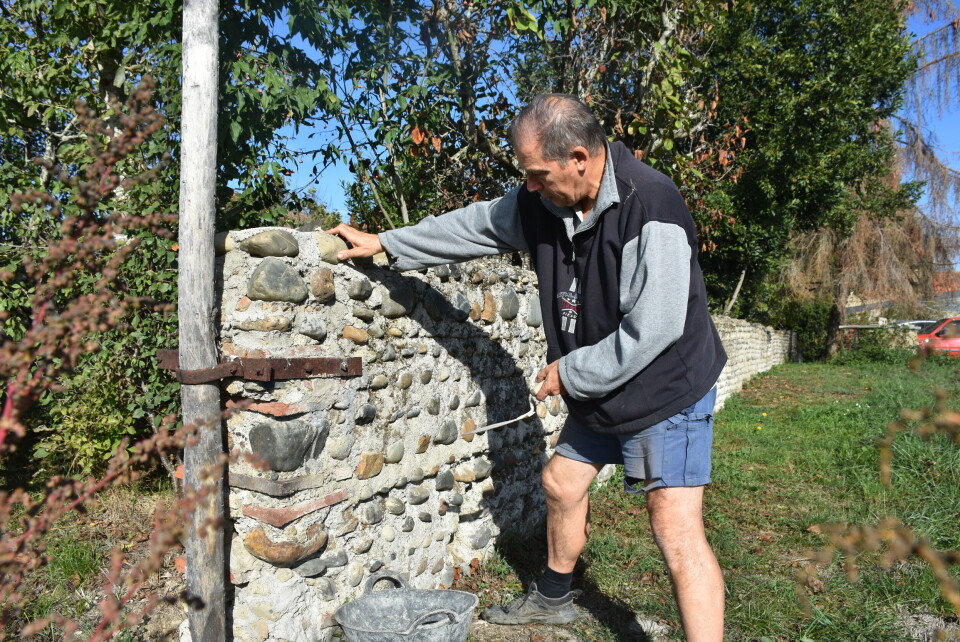
Like all the walls in our area, this one is made of round river stones held in place by copious infilling of rough lime mortar.
Walls are made of different materials in other parts of France but there are two universal lessons to learn here.
One lesson is that to do true renovation you have to understand the old methods in actuality, not just in theory.
This requires looking at examples and thinking hard about them, but it mostly comes down to physical trial and error.
The second lesson is that if you are going to learn by experiment, by making mistakes, you should practise on something that is not of vital importance.
My orchard wall was perfect: it didn’t hold up a roof, nothing depended on it, and I was the only person who cared what it looked like.
Read more: French DIY: My mission to build a cost-effective garden pergola
‘Ruthless’ gardening
The first task was to do some ruthless gardening: to carefully pull away the ivy, scrape and brush off the moss, and cut back any garden plants that prevented me from getting access to the stonework.
Next, inspection and deciding on the result I was aiming for.
The wall had lost its top layer and I had to establish where my restoration work would end by stretching a long level line from one end to the other.
Demolition
Now to the demolition.
I did not want to lose too much of the existing structure but I had to take it back to solid work that was undamaged by the weather.
This was my chance to study how the wall had originally been built.
As I carefully removed the stones, I began to appreciate the effort that had gone into selecting them.
They were all roughly the same size. The builder had chosen the biggest stones that could be manipulated in one hand (leaving the other free to apply mortar). If I needed new stones, I would have to follow this model.
Replicating the mortar
The mortar was not as straightforward as it seemed. It might have looked slapdash but it had been mixed and applied in a particular way that I would have to try to replicate.
It would be difficult to make an identical mortar because to do that I would have to have found the same aggregate.
I imagine this came from somewhere nearby to save transport costs – probably the river – but you cannot just dig holes wherever you want these days.
Bought sand would have to do, but I did not want it to be too fine. The original mortar was chunky, containing pebbles up to 2cm long.
To match it, I started with gravel and sieved it until it was fine enough to use but still had large particles in it.
Building the wall back up
To build the wall back up, I decided I should start with the deepest holes first and get the top more or less level before I finished it off.
The original, anonymous mason had managed to make neat rows of evenly spaced stones but I am sure he did an apprenticeship, whereas this was my first attempt.
I did my best and I hope the wall is still standing in another 150 years.
Related articles
DIY: Buying wood board for French property renovation can be minefield
French renovation: family DIY project saves money on garden gates
DIY: Upcycling pallets keeps costs down on French farmhouse renovation


